2. Hyperfocal focusing in landscapes: sharp from foreground to infinity
Focus at exactly one distance calculated in advance, and you get a landscape photo sharp from the foreground at your feet to the background at infinity. This guide shows you how to choose the optimal aperture by focal length, calculate the focus distance for your own camera, and use the quick table in the field.
Need the numbers right away? See the quick table, choose the table for your camera, then come back to read why.
What is hyperfocal focusing (hyperfocal distance)
Hyperfocal focusing means focusing at one point, measured as the distance to the camera’s sensor, so that everything from the near foreground to the far background is acceptably sharp. This distance is called the Hyperfocal Distance (HFD). Focusing a little beyond that point, as the tables below do, gives the background a margin of extra sharpness.
When to use it, when not to
- Use it when the scene has a close foreground and you want everything sharp from that foreground to the background at infinity.
- You don’t need it when the foreground doesn’t need to be sharp, such as when the foreground is a silhouette, or when there is no foreground (open space).
When you don’t use it, focus on the most prominent or most important subject in the frame. If there is no such subject, focus on the nearest detail in the frame (near the bottom edge), combined with the optimal aperture for the focal length you’re using (see below).

When there is no important foreground, focus on the prominent subject, the tree trunk.
Sharpness is relative: it depends on image size and viewing distance
Besides the viewer’s eyesight, sharpness depends on 2 factors:
- Image size: the smaller the image, the sharper it looks; the larger the image, the blurrier it looks (at the same viewing distance). Viewed as a whole on screen, everything is very sharp. Zoom to 100%, and the details are no longer as sharp as when small. That is why a 12 MP file looks sharper than a 36 MP file when viewed at 100% pixels, with all other factors equal.
- Viewing distance: the farther away, the sharper it looks; the closer, the blurrier it looks. A large billboard on the highway looks very sharp from far away; only up close do you see that it is coarsely printed and blurry. A photo viewed from 3 m (10 ft) looks sharper than up close at 25 cm (10 in).
That is why the calculator below asks for your megapixels (to calculate the print size) and your viewing distance: change either one, and the correct focus distance changes too.

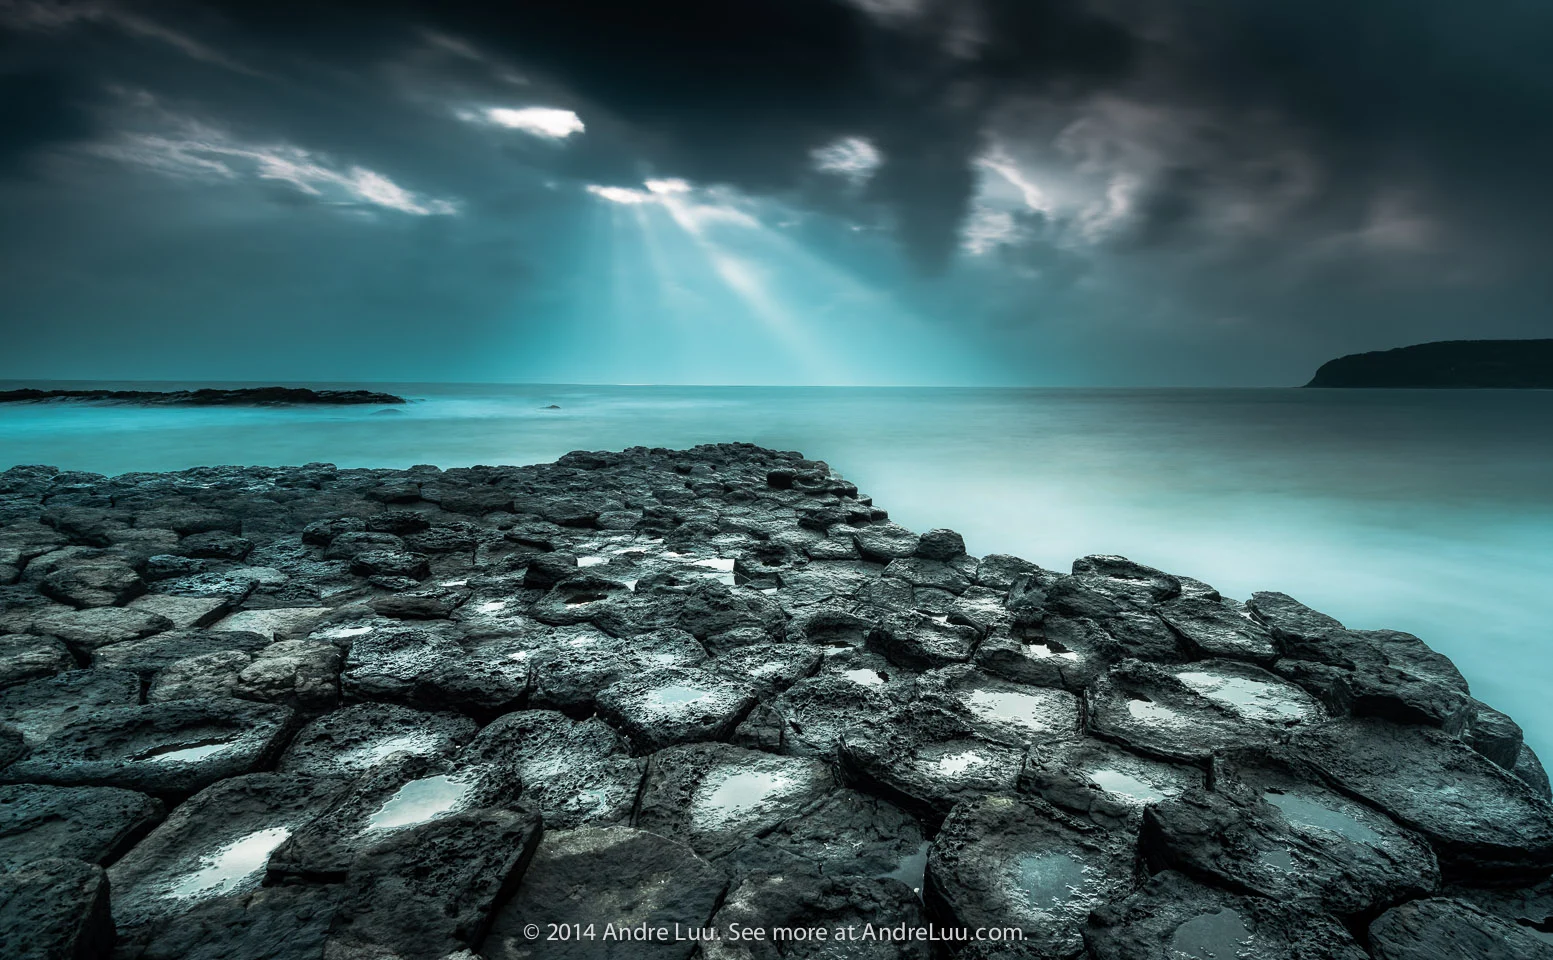
Nikon D800E at 16mm, f/11, focus distance 1 m (3.3 ft) on the rock patterns in front.
Why ready-made focus tables online may not be right for your camera
Because of the 2 factors above, the ready-made hyperfocal distance tables and hyperfocal distance calculators online may not be accurate if they don’t tell you which image size and viewing distance they are based on.
Most use the 35mm film-era standard, a circle of confusion of 0.03 mm, assuming a medium-size print (8×10 inches) viewed from about 25 cm (10 in). By the method in this guide, that equals a 24 MP file printed at 300 ppi and viewed from 50 cm (20 in). Today’s digital cameras come in many resolutions, giving many different image sizes. If your camera is not 24 MP, those tables and calculators will give a focus distance that is not optimal, which can blur the foreground or the background. This guide solves that: below you build a table for your own camera in 8 steps, or choose the quick table already calculated for your camera’s resolution.
Depth of field is deeper with a shorter focal length and a smaller aperture
The human eye “focuses” constantly, so it always sees everything sharp from near to infinity. A lens, however, has a depth of field (DOF): a zone of space that is sharp in the photo, with blur outside it. Whether the depth of field is deep or shallow depends on 2 factors:
- Focal length: the shorter it is, the deeper the depth of field. A 12mm wide-angle lens gives a deep depth of field, and a 200mm telephoto lens gives a shallow depth of field. That is why landscape photography usually uses 12mm to 24mm wide-angle lenses to be sharp from near to far. From 35mm up, the depth of field is not deep enough, or not good enough in quality because it takes f/22: at this smallest aperture the image gets much blurrier due to diffraction.
- Aperture: the smaller it is (large f-number, like f/11, f/16), the deeper the depth of field. A large aperture (small f-number, like f/2.0, f/1.8) gives a shallow depth of field. That is why landscape photography often uses f/8 to f/16.

Sony A7R at 14mm, f/8, focus distance 1.0 m (3.3 ft) right on the triangular post in the center.
Optimal aperture for each focal length range
The optimal aperture in landscape photography is the aperture that both draws out the highest sharpness of the lens and gives enough depth of field to be sharp from near to far.
According to lens reviews, most lenses are sharpest at around f/5.6 to f/8. Depending on the focal length, f/5.6 and f/8 may not give enough depth of field for landscapes. That is why for each focal length range you choose an aperture that is both the sharpest and gives enough depth of field.
Use the table below as a starting point. When shooting, zoom the image to 100% to see whether the foreground and background are sharp enough, then adjust up or down from there.
| Full-frame lens focal length | Crop 1.5x, 1.6x lens focal length | Optimal aperture |
|---|---|---|
| 10‑16mm | 8‑13mm | f/5.6 |
| 17‑20mm | 14‑16mm | f/8 |
| 21‑24mm | 17‑20mm | f/11 |
| 25‑35mm | 21‑24mm | f/13 or f/14 * |
* 36 MP cameras start to show strong diffraction beyond f/13–f/14, reducing contrast and sharpness very noticeably. Unless you must stop down to f/16 or f/22 (such as for a sunstar), you shouldn’t stop down past f/13 or f/14. The quick tables below do use f/16 at the longest focal lengths for full-frame cameras from 45 MP and crop cameras from 32 MP; note that the text above those tables explains why.

Nikon D800E at 19mm, f/8, focus distance 1.8 m (5.9 ft) right in the middle of the submerged rock in front.
Calculate the hyperfocal distance for your camera in 8 steps
Each digital camera has a different sensor size and resolution, which affect sharpness. That is why you should calculate and build your own table of focus distances for your camera and your lens focal lengths.
Use the HFD calculator right below, filling it in following these 8 steps in order.
Where to focus with your camera and lens
Based on a 300 ppi print viewed at the distance you enter. Other calculators use other standards, so their numbers differ.
Step 1: Sensor
In the Sensor field, choose the correct sensor factor for your camera:
For newer mirrorless cameras, choose by sensor. For full-frame cameras such as the Sony α7R VI and Sony α7 V (and also Nikon and Canon full-frame cameras), choose Full frame. For Fujifilm crop cameras such as the X-T5 (APS-C), choose Crop 1.5x. For Canon crop cameras such as the EOS R7 (APS-C), choose Crop 1.6x.
- Full frame (Canon 1DX, 5D1-3, 6D, Nikon D600-800/E, Sony A7/R, A850-900…)
- Crop 1.5x (Nikon crop cameras: D300, D200, DXXXX…)
- Crop 1.6x (Canon crop cameras: 7D, XXD, XXXD…)
Example: Sony A7R, choose Full frame.
Step 2: Megapixels
In the Megapixels box, choose your camera’s MP count. If it’s not in the list, choose Other… and type the MP count.
This setting represents the image size. Depending on the camera’s resolution, the file can be printed or displayed on screen at different maximum sizes. The calculator works out the maximum print size from the MP count, so you don’t need to fill it in, and shows that size in cm on the Print size (diagonal, 300 ppi) line. The table below shows these values, calculated at the highest quality of 300 ppi (the standard commonly used for high-quality prints), so in practice you can print larger.
| Camera resolution | Max Print Dimension (print diagonal at 300 pixels per inch) |
|---|---|
| 10 Mp | 15.5 inches |
| 12 Mp | 16.9 inches |
| 16 Mp | 19.6 inches |
| 18 Mp | 20.8 inches |
| 20 Mp | 22 inches |
| 24 Mp | 24 inches |
| 36 Mp | 29.4 inches |
| 42 Mp | 31.8 inches |
| 45 Mp | 33 inches |
| 50 Mp | 34.7 inches |
| 61 Mp | 38.1 inches |
| 67 Mp | 40 inches |
| 80 Mp | 44 inches |
| 100 Mp | 49 inches |
Example: a 36 MP Sony A7R has a max print dimension of 29.4 inches (from the table above), which is 74.8 cm as the calculator shows.
Step 3: Focal length (mm)
Type the lens focal length into the Focal length (mm) box. If you use a zoom lens, look at the focal lengths marked on the lens and calculate the HFD for each focal length you need, entering one focal length each time.
Example: Nikon 14-24 lens, calculating for 16mm.
Step 4: Aperture
In the Aperture box, choose the optimal aperture for the focal length from the table in the section above, or the aperture you want to use.
Example: Nikon 14-24 lens, calculating for 16mm, Sony A7R full-frame camera. According to the table, the optimal aperture is f/5.6. Choose f/5.6.
Step 5: Viewing distance (cm)
The distance from your eyes to the screen or the print. Enter it in the Viewing distance (cm) box.
Example: viewing the photo on a screen 50 cm (20 in) away, enter 50 cm.
The calculator defaults to 50 cm (20 in); change it to your own distance. Every table in this guide uses 50 cm (20 in).
Step 6: Read the HFD result
No need to press a button: the result appears as soon as you fill in or change a box. Look at the HFD (hyperfocal distance) line.
Step 7: Round the result up
The large number on the HFD (hyperfocal distance) line has already been rounded up to the next decimeter; the unrounded number is shown right next to it. You can round further up to a round number that’s easy to estimate.
Example: 1.79 m (5.9 ft) becomes 1.8 m (5.9 ft); I use 2 m (6.6 ft) to make it easy to estimate by eye.
Step 8: Check again out to infinity
Enter the rounded number into the Focus distance (m), optional box to see whether it’s sharp to infinity. If not, add 1 dm (4 in).
This box lets you check how near the depth of field starts and whether its far end reaches infinity. Precisely speaking, it runs from the Nearest Acceptable Sharpness to the Furthest Acceptable Sharpness. If you leave it empty, the calculator calculates for a focus distance exactly equal to the rounded HFD.
Example: enter 2 m (6.6 ft) into that box, and you see the depth of field is sharp from 0.95 m (3.1 ft) to infinity. That’s it; write down those values:
- Nearest Acceptable Sharpness: 0.95 m (3.1 ft)
- Furthest Acceptable Sharpness: ∞ (infinity)

Canon 5D3 at 15mm, f/11, focus distance 1.0 m (3.3 ft) right at the right edge of the puddle in front.
Build a hyperfocal table for your camera
Click Build my table in the calculator above, or repeat steps 1 to 8 for every focal length and aperture pair you want to use, and build a table like the one below. Save it on your phone or print it out for easy reference when shooting. If you don’t want to calculate it yourself, the quick tables below are already calculated for cameras from 16 to 67 MP.
Example: 36 MP full-frame camera, viewing distance 50 cm (20 in).
| Focal length | f/5.6 | f/8.0 | f/11 |
| 12mm | 1.1m | 0.8m | |
| 14mm | 1.4m | 1.0m | |
| 15mm | 1.6m | 1.2m | |
| 16mm | 1.8m | 1.3m | |
| 17mm | 1.5m | 1.1m | |
| 18mm | 1.6m | 1.2m | |
| 20mm | 2.0m | 1.5m | |
| 21mm | 1.6m | ||
| 24mm | 2.1m | ||
| 28mm | 2.8m |
Simplify the table: a focus distance that matches the focal length number, easy to remember
From any value in the table, you can stop down by one more stop (a larger f-number) or move the focus distance farther without hurting sharpness; on the contrary, it’s even safer. This holds while you still use the apertures in the table; stopping down past f/13–f/14 lets diffraction reduce some detail (see note *).
That is why I move the focus distance farther and use flexible apertures, so that the focus distance matches the focal length number: at 16mm, focus at 1.6 m (5.2 ft). Below is the table simplified from the one above, for a 36 MP full-frame camera, viewing distance 50 cm (20 in).
| Focal length | f/5.6 | f/8.0 | f/11 |
| 12mm | 1.2m | ||
| 14mm | 1.4m | ||
| 15mm | 1.5m | ||
| 16mm | 1.6m | ||
| 17mm | 1.7m | ||
| 18mm | 1.8m | ||
| 19mm | 1.9m | ||
| 20mm | 2.0m | ||
| 21mm | 2.1m | ||
| 24mm | 2.4m | ||
| 28mm | 2.8m |
Quick hyperfocal tables for common resolutions
I’ve prepared quick tables for common resolutions, all based on a viewing distance of 50 cm (20 in). The focus distance has been adjusted to match the focal length number in decimeters (dm), so you only need to remember which aperture goes with which focal length range.
Example: 36 MP full-frame camera, 16mm, use f/8 and focus at 16 dm, which is 1.6 m (5.2 ft).
Note for high-resolution cameras (from 45 MP full frame, from 32 MP crop): the tables assume you use the whole file: printed as large as possible at 300 ppi and viewed from 50 cm (20 in). The larger the print, the stricter the sharpness threshold, so the usable depth of field gets thinner. That is why the tables go up to f/16 at the longer focal lengths, to keep everything sharp from the foreground to infinity. At f/16, the diffraction blur (about 0.02 mm) is close to the sharpness threshold the tables use, so nowhere in the image keeps pixel-level detail; in return, sharpness is even from front to back. If you print smaller or view from farther away, you can open up about one stop. For maximum detail, stop at f/11, focus a little farther than the table (at the f/11 hyperfocal distance the calculator above gives) and accept that the nearest part of the foreground is slightly soft.
For full-frame cameras
Choose the resolution closest to your camera. Your camera’s MP count is listed in its specifications, or multiply the width by the height of the original file: 7,360 × 4,912 is 36 MP. Example: Sony α7R VI 66.8 MP (choose the 67 mp tab); Sony α7 V 33 MP (choose the 32 mp tab).
67 mp
| Focal length | Aperture | Focus distance |
| 10mm | f/5.6 | 1.0m |
| 11‑14mm | f/8 | 1.1m..1.4m |
| 15‑20mm | f/11 | 1.5m..2.0m |
| 21‑28mm | f/16 | 2.1m..2.8m |
61 mp
| Focal length | Aperture | Focus distance |
| 10mm | f/5.6 | 1.0m |
| 11‑15mm | f/8 | 1.1m..1.5m |
| 16‑21mm | f/11 | 1.6m..2.1m |
| 22‑28mm | f/16 | 2.2m..2.8m |
45-50 mp
| Focal length | Aperture | Focus distance |
| 10‑12mm | f/5.6 | 1.0m..1.2m |
| 13‑17mm | f/8 | 1.3m..1.7m |
| 18‑23mm | f/11 | 1.8m..2.3m |
| 24‑28mm | f/16 | 2.4m..2.8m |
42 mp
| Focal length | Aperture | Focus distance |
| 10‑13mm | f/5.6 | 1.0m..1.3m |
| 14‑18mm | f/8 | 1.4m..1.8m |
| 19‑25mm | f/11 | 1.9m..2.5m |
36 mp
| Focal length | Aperture | Focus distance |
| 10‑14mm | f/5.6 | 1.0m..1.4m |
| 15‑20mm | f/8 | 1.5m..2.0m |
| 21‑28mm | f/11 | 2.1m..2.8m |
24 mp
| Focal length | Aperture | Focus distance |
| 10‑17mm | f/5.6 | 1.0m..1.7m |
| 18‑24mm | f/8 | 1.8m..2.4m |
| 28mm | f/11 | 2.8m |
20 mp
| Focal length | Aperture | Focus distance |
| 10‑19mm | f/5.6 | 1.0m..1.9m |
| 20‑27mm | f/8 | 2.0m..2.7m |
| 28mm | f/11 | 2.8m |
16 mp
| Focal length | Aperture | Focus distance |
| 10‑21mm | f/5.6 | 1.0m..2.1m |
| 24‑28mm | f/8 | 2.4m..2.8m |
For 1.6x and 1.5x crop cameras
Choose the resolution closest to your crop camera (calculated for an average factor of 1.55x; the difference between 1.5x and 1.6x is at most about 1 dm (4 in)). Examples: Fujifilm X-T5 40 MP (1.5x); Canon EOS R7 32 MP (1.6x).
40 mp
| Focal length | Aperture | Focus distance |
| 8mm | f/5.6 | 0.8m |
| 9‑12mm | f/8 | 0.9m..1.2m |
| 13‑17mm | f/11 | 1.3m..1.7m |
| 18‑20mm | f/16 | 1.8m..2.0m |
32 mp
| Focal length | Aperture | Focus distance |
| 8‑9mm | f/5.6 | 0.8m..0.9m |
| 10‑13mm | f/8 | 1.0m..1.3m |
| 14‑18mm | f/11 | 1.4m..1.8m |
| 19‑20mm | f/16 | 1.9m..2.0m |
24 mp
| Focal length | Aperture | Focus distance |
| 8‑10mm | f/5.6 | 0.8m..1.0m |
| 11‑15mm | f/8 | 1.1m..1.5m |
| 16‑20mm | f/11 | 1.6m..2.0m |
20 mp
| Focal length | Aperture | Focus distance |
| 8‑11mm | f/5.6 | 0.8m..1.1m |
| 12‑17mm | f/8 | 1.2m..1.7m |
| 18‑20mm | f/11 | 1.8m..2.0m |
16 mp
| Focal length | Aperture | Focus distance |
| 8‑13mm | f/5.6 | 0.8m..1.3m |
| 14‑18mm | f/8 | 1.4m..1.8m |
| 20mm | f/11 | 2.0m |
In the field: look up the table, focus, then turn the camera back to your composition
When shooting, check the focal length and aperture you’re using, look them up in your table, then focus at that distance.
Example: 36 MP full-frame camera, per the table above, 24mm at f/11 is 2.4 m (7.9 ft).
- Find an object exactly that distance from you, not necessarily within the scene you want to shoot.
- Turn the camera toward that object and focus.
- Turn the camera back, set your composition, then shoot.
Three ways to focus, from most accurate
- Live View & EVF: zoom the image as large as possible. If your camera has focus peaking (colored outlines on the areas in focus), as Sony cameras do, use it to focus more accurately and faster. Newer mirrorless cameras have an EVF (electronic viewfinder). You zoom into the focus point right in the viewfinder: the image is large and clear, without the sun glare you get when looking at the LCD (rear screen) outdoors.
- Autofocus (AF): once focused, lock focus with the AF Lock button, or turn off AF on the camera and on the lens. This method is less accurate than Live view.
- Manual focus: turn from far to near, watch the focus indicator in the EVF, and stop as soon as the indicator lights up.

Sony A7R at 15mm, f/5.6, focus distance 1.6 m (5.2 ft) on the sand patterns in front.
Place the main foreground exactly at the hyperfocal distance
When the foreground is the key element of the composition, focus at the optimal setting you calculated, then move the camera so the foreground sits exactly at that distance. The hyperfocal distance coincides with the foreground, so the foreground is very sharp, becoming a hook that draws the viewer’s eye deep into the photo.
Always check sharpness when shooting
This technique is based on an optical formula, meaning theory, so you need to check it in practice when shooting:
- Press the Depth of Field Preview button (see your camera’s manual) to see the actual depth of field in the viewfinder.
- Better: take a test shot, review it and zoom to 100% to check sharpness from the foreground to the background.
With mirrorless cameras: On the Sony α7R VI and α7 V, assign the Aperture Preview function to a button (MENU → Setup → Operation Customize → Custom Key/Dial Set.), and hold that button to see the depth of field. On the Nikon Z8, assign the Preview role to a button in f2 Custom controls (shooting). The Canon EOS R5 Mark II has a depth-of-field preview button. In manual focus, the Fujifilm X-T5 shows a blue bar for the depth of field (to see this bar on the standard display, check both AF DISTANCE INDICATOR and MF DISTANCE INDICATOR in SCREEN SET-UP → DISP. CUSTOM SETTING in the setup menu); for DEPTH-OF-FIELD SCALE, choose PIXEL BASIS when you view images at high resolution on a screen.
Extra benefit: no need to refocus for each shot
You keep the lens as it is for the whole shoot, with no need to refocus for each photo, unless you change focal length, change aperture, or accidentally turn the focus ring. You save a lot of time to focus on capturing the moment, and every shot is sharp from about half the focus distance to infinity.
Just remember to move the camera so the distance to the foreground matches the hyperfocal distance.

Nikon D800E at 22mm, f/11, focus distance 2.2 m (7.2 ft) right on the largest reflecting rock face on the right.
Points to note so your photos are always sharp
- Focusing directly on the nearest foreground. The focus point is closer than the point in the table, so the background at infinity goes soft. Fix: focus exactly at the point in the table. Then everything from at least about half that distance to infinity is sharp, as in the example in step 8: focus at 2 m (6.6 ft), sharp from 0.95 m (3.1 ft).
- Half-pressing the shutter button and the camera refocuses on its own. The focus point jumps somewhere else. Fix: lock focus with the AF Lock button, or turn off AF after focusing.
- Changing focal length or aperture without refocusing. The old focus point is no longer right. Fix: look up the table and refocus every time you change.
- Using a 24 MP camera’s table for a higher-resolution camera. Zooming to 100% shows a soft foreground or background. Fix: choose the correct tab for your camera’s resolution.
Before shooting: 5 steps
- Choose the table for your camera type (full frame or crop) and resolution, and save it on your phone.
- Choose your focal length, then choose the aperture according to the table.
- Focus at the distance in the table: Live view zoomed in, or AF and then lock focus.
- Move the camera so the main foreground sits exactly at the focus distance, and nothing important is closer than half that distance.
- Take a test shot and zoom to 100% to check the foreground and background. From then on, don’t turn the zoom ring or the focus ring again.
Your next step
Before your next shoot, open the HFD calculator above and build a table for your camera and the focal lengths you use most, or choose the quick table closest to your camera. Save it on your phone. In the field, focus by the table, then zoom to 100% to check the foreground and background.
Then continue with 3. How to increase or decrease exposure with shutter speed, aperture and ISO. When you stop down to f/11 or f/16 following the table, the image receives less light; guide 3 shows you how to compensate with shutter speed and ISO.
This article is for general education and is provided "as is". Photography outdoors carries risk: you are responsible for your own safety, gear and decisions. Disclaimer
Fine art prints
Signed, made to order on archival fine art paper, with the facts behind every photograph.
See the prints
Photo trips with Andre
Small groups to Lofoten, Iceland and Vietnam, at the right season and the right hour.
Ask about the next trips